
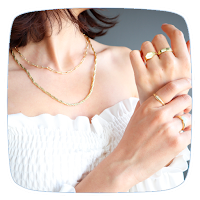
Jewelry Making Guide
King Star Studio Sports Contains ads
Mastering Jewelry Making: A Comprehensive Guide for Beginners
- Price
- Free
- No in-app purchases
- Updated
- May 29
- 2024 · v1.0.0
Screenshots
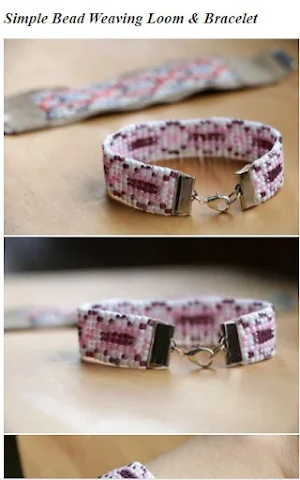
About Jewelry Making Guide
Mastering Jewelry Making: A Comprehensive Guide for Beginners
Jewelry making is a delightful and rewarding craft that allows you to create unique, personalized pieces. Whether you're interested in creating elegant necklaces, charming bracelets, or intricate earrings, learning the basics of jewelry making can set you on the path to crafting beautiful accessories. This comprehensive guide will cover the essential tools, materials, and techniques for beginners, helping you start your jewelry-making journey with confidence.
Why Learn Jewelry Making?
Learning jewelry making offers several benefits:
Creative Expression: Design and create unique pieces that reflect your personal style.
Cost Savings: Make your own jewelry instead of purchasing expensive store-bought items.
Personalized Gifts: Craft one-of-a-kind gifts for friends and family.
Therapeutic Hobby: Enjoy the meditative and relaxing process of crafting.
Getting Started: Basic Jewelry-Making Techniques
1. Stringing Beads
1.1 Necklace and Bracelet Stringing
Cut Beading Wire: Measure and cut the desired length, adding a few extra inches for securing the clasp.
Attach a Clasp: Thread a crimp bead and one half of the clasp onto the wire. Loop the wire back through the crimp bead and use flat-nose pliers to secure it by flattening the crimp bead.
String Beads: Add beads in your desired pattern, pushing them down to the crimp bead.
Finish with a Clasp: Once all beads are strung, add a crimp bead and the other half of the clasp. Loop the wire back through the crimp bead and a few adjacent beads before securing the crimp bead.
2. Creating Wire Loops
2.1 Simple Loop
Cut Wire: Cut a piece of wire or headpin to the desired length.
Add Bead: Thread a bead onto the wire.
Make a Loop: Using round-nose pliers, bend the wire at a 90-degree angle just above the bead. Rotate the pliers to create a loop.
Trim Excess: Use wire cutters to trim any excess wire.
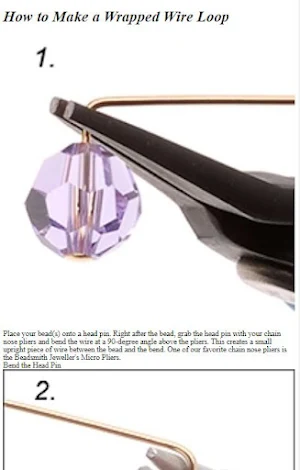
2.2 Wrapped Loop
Cut Wire: Cut a piece of wire or headpin.
Add Bead: Thread a bead onto the wire.
Create a Loop: Bend the wire at a 90-degree angle above the bead. Using round-nose pliers, create a loop but do not close it completely.
Wrap the Wire: Hold the loop with chain-nose pliers and wrap the tail of the wire around the stem below the loop.
Trim and Tuck: Trim any excess wire and tuck in the end using chain-nose pliers.
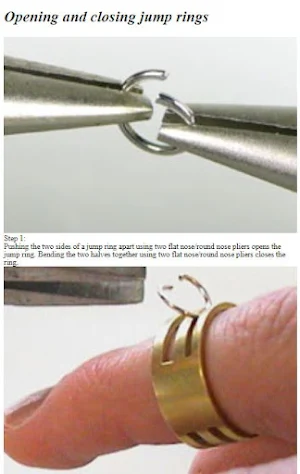
3. Opening and Closing Jump Rings
Open Jump Ring: Hold the jump ring with two pairs of pliers. Twist one side away from you to open the ring.
Attach Components: Slide the open jump ring through the components you wish to connect.
Close Jump Ring: Twist the jump ring back into place, ensuring the ends meet perfectly.
Advanced Jewelry-Making Techniques
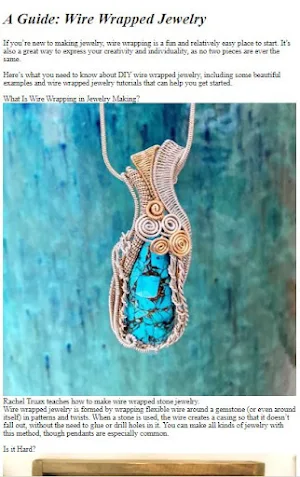
1. Wire Wrapping
1.1 Wire-Wrapped Pendants
Cut Wire: Cut a length of wire long enough to wrap around the stone or bead.
Create a Frame: Form the wire into a shape that will secure the stone, leaving enough wire at the top to create a bail (loop for hanging).
Wrap and Secure: Wrap the wire around the stone, securing it in place. Create a bail at the top using round-nose pliers.
2. Bead Weaving
2.1 Peyote Stitch
Thread Needle: Thread a beading needle with a comfortable length of beading thread.
Pick Up Beads: Pick up an even number of beads.
Start Weaving: Pass the needle back through the first bead added, creating a loop. Add a new bead and skip the next bead, passing the needle through the following bead.
Continue Pattern: Continue adding beads and weaving through every other bead until the desired length is achieved.
Jewelry making is a delightful and rewarding craft that allows you to create unique, personalized pieces. Whether you're interested in creating elegant necklaces, charming bracelets, or intricate earrings, learning the basics of jewelry making can set you on the path to crafting beautiful accessories. This comprehensive guide will cover the essential tools, materials, and techniques for beginners, helping you start your jewelry-making journey with confidence.
Why Learn Jewelry Making?
Learning jewelry making offers several benefits:
Creative Expression: Design and create unique pieces that reflect your personal style.
Cost Savings: Make your own jewelry instead of purchasing expensive store-bought items.
Personalized Gifts: Craft one-of-a-kind gifts for friends and family.
Therapeutic Hobby: Enjoy the meditative and relaxing process of crafting.
Getting Started: Basic Jewelry-Making Techniques
1. Stringing Beads
1.1 Necklace and Bracelet Stringing
Cut Beading Wire: Measure and cut the desired length, adding a few extra inches for securing the clasp.
Attach a Clasp: Thread a crimp bead and one half of the clasp onto the wire. Loop the wire back through the crimp bead and use flat-nose pliers to secure it by flattening the crimp bead.
String Beads: Add beads in your desired pattern, pushing them down to the crimp bead.
Finish with a Clasp: Once all beads are strung, add a crimp bead and the other half of the clasp. Loop the wire back through the crimp bead and a few adjacent beads before securing the crimp bead.
2. Creating Wire Loops
2.1 Simple Loop
Cut Wire: Cut a piece of wire or headpin to the desired length.
Add Bead: Thread a bead onto the wire.
Make a Loop: Using round-nose pliers, bend the wire at a 90-degree angle just above the bead. Rotate the pliers to create a loop.
Trim Excess: Use wire cutters to trim any excess wire.
2.2 Wrapped Loop
Cut Wire: Cut a piece of wire or headpin.
Add Bead: Thread a bead onto the wire.
Create a Loop: Bend the wire at a 90-degree angle above the bead. Using round-nose pliers, create a loop but do not close it completely.
Wrap the Wire: Hold the loop with chain-nose pliers and wrap the tail of the wire around the stem below the loop.
Trim and Tuck: Trim any excess wire and tuck in the end using chain-nose pliers.
3. Opening and Closing Jump Rings
Open Jump Ring: Hold the jump ring with two pairs of pliers. Twist one side away from you to open the ring.
Attach Components: Slide the open jump ring through the components you wish to connect.
Close Jump Ring: Twist the jump ring back into place, ensuring the ends meet perfectly.
Advanced Jewelry-Making Techniques
1. Wire Wrapping
1.1 Wire-Wrapped Pendants
Cut Wire: Cut a length of wire long enough to wrap around the stone or bead.
Create a Frame: Form the wire into a shape that will secure the stone, leaving enough wire at the top to create a bail (loop for hanging).
Wrap and Secure: Wrap the wire around the stone, securing it in place. Create a bail at the top using round-nose pliers.
2. Bead Weaving
2.1 Peyote Stitch
Thread Needle: Thread a beading needle with a comfortable length of beading thread.
Pick Up Beads: Pick up an even number of beads.
Start Weaving: Pass the needle back through the first bead added, creating a loop. Add a new bead and skip the next bead, passing the needle through the following bead.
Continue Pattern: Continue adding beads and weaving through every other bead until the desired length is achieved.
Alternatives to Jewelry Making Guide
Looking for apps like Jewelry Making Guide? Here are 6 similar Android apps on Google Play. All of them are free to download.
-
How to Stop Bed-Wetting
-
Housekeeping Guide
-
Teeth whitening Tutorial
-
Vitamins & Supplements Guide
-
Worms in Humans Guide
-
Freckles Care Tips
| App | Rating | Price | Installs | Last updated | Compare |
|---|---|---|---|---|---|
| Jewelry Making Guide | – | Free | 0+ | May 29, 2024 | |
| How to Stop Bed-Wetting | – | Free | 0+ | Jun 9, 2024 | Compare |
| Housekeeping Guide | – | Free | 0+ | Jun 9, 2024 | Compare |
| Teeth whitening Tutorial | – | Free | 0+ | Jun 9, 2024 | Compare |
| Vitamins & Supplements Guide | – | Free | 0+ | Jun 7, 2024 | Compare |
| Worms in Humans Guide | – | Free | 0+ | Jun 7, 2024 | Compare |
| Freckles Care Tips | – | Free | 0+ | Jun 7, 2024 | Compare |
Similar apps on Google Play
- How to Stop Bed-Wetting
- Housekeeping Guide
- Teeth whitening Tutorial
- Vitamins & Supplements Guide
- Worms in Humans Guide
- Freckles Care Tips
- Eyebrow Microblading Guide
- Kitchen Cleaning Tutorial
- How to Prevent Infestations
- DIY Halloween Decorations
- Public Speaking Skills Guide
- Pregnancy Belly Shape Guide
- How To Get Rid Of Eye Bags
- Pregnancy Tests Tutorial
- Interior Design Tutorial
- Remove Laundry Stains Guide
- Pet Insurance Tutorial
- DIY Foot Reflexology
- How To Jump Higher
- Homemade Perfume Tutorial
- Soldering Iron Guide
- Sewing Techniques Guide
- Soccer Tricks Guide
- Sewing Machine Guide
- Quilting Techniques Guide
- Plumbing Basics Guide
- How to Start Seeds & Planting
- Carpenter Skills Guide
- Basic Welding Guide
- Goalkeeper Training Guide
- DIY Home Repair
- Acrylic Painting Guide
- How To Do Soccer Drills
- How to Do Gymnastics Moves